


Houdini became a large part of my workflow for this project, creating procedural geometry and edge wear saved me hours and hours of time I would've spent in Zbrush. As well as allowing me to create an effect or two for my scenes.
Houdini
Smoke Simulation
For creating a smoke simulation for my chimneys, I started by creating a blank pyro sim, then slowly adding turbulences of differing sizes to create the certain wispy look of chimney smoke, while having it dissipate quickly. From there I used a built in Houdini cloud material to get a render in Karma and use that as a sequence in Unreal.
Meshkit Creation
When I started making this kit, the idea occured to me that displacing every single brick in my scene would cause me a great deal of memory usage, and would be nearly impossible to control how each wall and corner connected. So I went about making a Houdini HDA that allowed me to subdivide my geo, then mask based on my height texture, use the mountain node to physically bring out the geo of the bricks, and then polyreduce the result. I could either connect where walls and corners met manually, or use the Meshkit on a connected version of the corner and wall, so that the changed Geo matched up perfectly with eachother.
Edge Wear Boolean Tool
For many of my stone assets, I used another tool which created actual edge wear with a boolean and noise in Houdini. These served as my hi poly "sculpts" and saved me a great deal of time not having to sculpt out every little crack and cut in the stone. I then added some multicuts to my lo poly mesh, and shaped the lo to have relatively simialar edge wear, then baked it all in with Painter.
Bricks, Bricks... Bricks!!!
So much of this project is taken up by these brick tilables, and to honor that I created a dirtier and roughed up version, my base, and one without offset in Designer. Using just these three I was able to texture the bulk of my scene with very little one time textures, and a great deal of visual interest.


Material Blends
I blended the dirtier brick texture, and the ordinary bricks to create visual interest across my scenes, and to make it look like there were dripping areas in some cases. This and all of the other brick structures in my scene don't use any displacement at all, just a lot of polyreduced geo, making it perfect for a game pipeline.

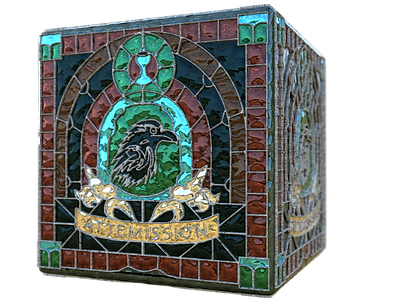
Stained Glass Generator
To start the base of the texture I did a simple linework of the stained glass I wanted, then the color pass, putting them in Designer.


I masked out the metal with the linework and different areas that would have different glass "patterns," with the color and a histogram. Voronoi and damas noises made for excellent patterns for the glass surface. And used a dirt with curvature to capture bits of dirt/dust that had settled over the years. And from there, I created more patterns of stained glass saving me a lot of time, since it only took plugging in new linework and color passes, rather than starting from scratch. Which allowed me to create an atlas to maximize texture usage.


More Textures
ALL of the textures in this scene were created by me, either in Designer or Painter. Though most of this scene relies on tilables, some special props of course got their own substance textures. Even down to the leaves, which I sculpted, then put into painter to get proper control of my foliage.


Blockout
With a scene like this, with multiple shots, window lengths, etc. I found it important to create a large kit of walls, wall slivers, windows, corners, and other details. By blocking in a lot of my kit pieces early, I saved a lot of placement time. Since all I had to do was update my kit pieces from the blockout, and Voila. They were all in the right spot, no having to move things around every time I have a new version.


